How to File a Roof Insurance Claim (and Get It Approved)

A roof insurance claim is decided on evidence. A successful claim depends on proof of damage, what caused it, and when you reported it. The adjuster works from your photos, your contractor’s report, and the storm records for your area. Hail damage you can’t see from the ground still has to show up in that file, or it won’t show up in the payout.
To file a roof insurance claim, you’ll document the damage with photos and video, review your policy’s coverage and deductible, and schedule a professional roof inspection. You’ll then need to report the loss to your insurer before the filing deadline, meet the adjuster on-site, and complete repairs with a licensed contractor.
The process typically takes 30 to 60 days from first notice of loss to final payment.
Does Homeowners Insurance Cover Roof Damage?
Standard homeowners insurance (HO-3 policies) covers roof damage caused by sudden, accidental events that insurers call “covered perils.” If a windstorm rips off shingles, a hailstorm dents your metal roof, or a fallen tree punches through the decking, those losses are typically covered.
Coverage stops where maintenance begins. Insurers won’t pay for damage that has built up over months or years because you skipped out on the upkeep. Insurance protects against unexpected events, not predictable wear. That line between sudden damage and slow decline is exactly what determines whether homeowners insurance covers a roof leak in the first place.
Covered vs. Excluded Causes of Roof Damage
| Typically Covered (Sudden Perils) | Typically Excluded |
|---|---|
| Wind and tornado damage | Normal wear and aging |
| Hail impact | Deferred maintenance or neglect |
| Fallen trees or limbs | Manufacturer defects (a warranty issue) |
| Fire and lightning | Gradual leaks you failed to address |
| Weight of ice or snow | Cosmetic damage (if an exclusion applies) |
| Vandalism | Pest or animal damage (varies by policy) |
There may still be a gray area between those two columns. A roof leak is covered if it started because of a sudden storm, but excluded if water seeped through cracked flashing you ignored for two years. Your insurer will investigate the root cause, not just the symptom.
Policy Endorsements That Change Your Coverage
Read the endorsements on your declarations page. Some carriers add a cosmetic damage exclusion for metal or asphalt roofs, meaning hail dents that don’t affect function aren’t covered. Others impose a separate wind/hail deductible (often 1% to 5% of your dwelling coverage) instead of your standard flat deductible.
If your roof is older than 15 or 20 years, check whether your policy has shifted you from replacement cost to actual cash value through a roof-age endorsement.
When Should You File a Roof Insurance Claim?
Not all roof damage justifies a claim. Filing a weak claim that gets denied, or one where the repair barely exceeds your deductible, can still end up in your claims history and raise future premiums. Run through a quick check before you call:
- Damage cause: Did a covered peril cause it? Shingles curling from age aren’t a claim.
- Repair cost vs. deductible: If repairs cost $2,500 and your deductible is $2,000, you’d recover only $500, which may not be worth the claim record.
- Roof age and policy type: An older roof on an ACV (Actual Cash Value) policy may pay only a fraction of replacement cost after depreciation.
- Visible severity: Missing shingles, punctured decking, or active leaks after a storm almost always justify filing a claim.
If the damage is clearly storm-related and repair estimates run at least double your deductible, filing makes financial sense. If you’re on the fence, get a professional inspection first, since that report costs less than a misguided claim.
How to File a Roof Insurance Claim (Step by Step)
Step 1: Document the Damage Immediately
Start recording before you clean up anything. Take wide-angle photos of each roof slope, then close-ups of individual damage points like cracked shingles, dented flashing, or exposed underlayment, and photograph the interior too (especially ceiling stains and attic leaks). Most phone cameras embed date and time in the file, which will be important if your insurer questions when the damage occurred. Documenting hail damage and wind damage from multiple angles gives the adjuster less room to reclassify it as age-related wear.
Step 2: Prevent Further Damage
Your policy requires you to take reasonable steps to prevent additional loss, which means tarping an exposed area, boarding up a hole, or calling an emergency service to stop an active leak. Keep every receipt, since your insurer should reimburse these emergency mitigation costs as part of the claim.
Step 3: Review Your Policy and Deductible
Pull up your declarations page and check three things: whether the event (“peril”) that caused the damage is covered, what your deductible is (standard vs. wind/hail), and whether your roof is insured at replacement cost or actual cash value.
Step 4: Get a Professional Roof Inspection
Hire a licensed, insured roofing contractor to inspect the roof and provide a written damage report. This report becomes your primary evidence. A reputable contractor documents every affected area, notes the type of damage (impact, uplift, puncture), and provides a line-item repair or replacement estimate.
Step 5: File the Claim Before Your Deadline
Call your insurer’s claims line or file online. Most policies require you to report damage promptly, and state laws set filing windows that range from one to three years depending on where you live. Carriers scrutinize late filings, so don’t wait. Have your policy number, the date of the event, and a brief description of the damage ready. The representative will assign a claim number and schedule an adjuster visit.
Step 6: Meet the Adjuster On Site
The adjuster works for the insurance company, not for you. Being present during the inspection lets you point out every damaged area your contractor identified, so bring the contractor’s report and your own photos. Ask whether they’re inspecting the full roof or just the slopes visible from the ground, because a ground-only inspection on a steep roof can easily miss damage. If your contractor’s report differs from the adjuster’s scope, ask the adjuster to document the discrepancy on the spot.
Step 7: Review the Estimate and Negotiate if Needed
Your insurer sends a written estimate and payment breakdown. Compare it against your contractor’s estimate, checking line by line for drip edge, starter strip, ice-and-water shield in valleys, and any code upgrades your local building department requires. If the adjuster’s scope comes in lower, your contractor can submit a supplement, a formal (and routine) request for additional line items with supporting photos.
Step 8: Complete Repairs and Recover Depreciation
Once you approve the scope, your contractor completes the work. If you have a replacement cost policy, your insurer initially withholds a portion called recoverable depreciation. After the repairs are finished, submit the final invoice and proof of completion to release that remaining amount. Skipping this step forfeits the withheld depreciation, which on an older roof can be a large share of the total claim.
How Roof Claim Payouts Work
The payout method your insurer uses determines how much you actually receive. The two standards are Actual Cash Value (ACV) and Replacement Cost Value (RCV).
| Actual Cash Value (ACV) | Replacement Cost Value (RCV) | |
|---|---|---|
| Definition | Replacement cost minus depreciation for age and condition | Full cost to replace with similar materials, no age deduction at final payout |
| Initial check | ACV amount minus deductible | ACV amount minus deductible (depreciation withheld) |
| After repairs | No additional payment | Depreciation released on proof of completed work |
| Best for | Lower premiums if you accept the risk | Older roofs and full-cost recovery |
| Watch out for | Depreciation comes out of pocket on older roofs | Must finish repairs within the policy deadline to recover depreciation |
Here’s an example:
Say a roof replacement costs $18,000. The roof is 12 years old with a 25-year expected lifespan, so the insurer calculates roughly 48% depreciation ($8,640), and your deductible is $1,500.
- ACV policy payout: $18,000 minus $8,640 depreciation minus $1,500 deductible = $7,860. That’s all you get.
- RCV policy first check: the same $7,860.
- RCV policy after repairs: submit the final invoice and recover the $8,640 in depreciation, bringing total reimbursement to $16,500 ($18,000 minus the $1,500 deductible).
The difference between $7,860 and $16,500 is a perfect example of why you should know your policy type before you file a roof insurance claim.
There’s also a matter of ordinance and law coverage: if local building codes have changed since your roof was installed, you may need to upgrade components during replacement, and a standard policy may not cover those code upgrades without that endorsement. It helps to know what a roof replacement costs so you can sanity-check both the estimate and the payout.
What Happens During a Roof Insurance Inspection?
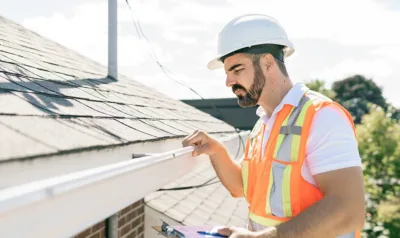
The adjuster inspects accessible roof surfaces for storm damage (hail strikes, missing or lifted shingles, cracked tiles, damaged flashing, gutter dents) and checks interior ceilings and attic spaces for water intrusion. The visit usually takes 45 minutes to two hours.
Have these ready before the adjuster arrives:
- Your contractor’s written inspection report and photos of the damage
- Your own photo and video documentation with timestamps
- Receipts for emergency mitigation (tarps, board-ups, water extraction)
- A copy of your policy declarations page
Walk the property with the adjuster and point out every area your contractor flagged. Be polite and factual, and if you disagree with the findings, note the specific areas and follow up in writing. Property claims commonly take several weeks from filing to final payment (longer after a major storm), so set expectations accordingly and stay engaged.
Why Roof Insurance Claims Get Denied and How to Fight Back
Six reasons account for most roof claim denials:
- Wear and tear: The adjuster rules the damage age-related, not storm-caused.
- Late reporting: You missed the policy or state filing deadline.
- Insufficient documentation: No photos, no contractor report, or no evidence of a storm in your area.
- Pre-existing damage: The insurer’s records show the damage predated the claimed event.
- Cosmetic damage exclusion: Your policy excludes dents that don’t impair function.
- Maintenance neglect: Clogged gutters, moss growth, or broken seals you never addressed.
A denial letter must state the specific reason, so read it carefully.
How to Appeal a Denied Roof Claim
Request the adjuster’s full inspection report and photos, then compare their findings to your contractor’s documentation. If significant damage was missed or misidentified, submit a written appeal with your contractor’s rebuttal, additional photos, and National Weather Service storm records confirming the event in your area.
If the internal appeal fails, you can hire a licensed public adjuster to re-inspect and negotiate. Public adjusters charge a fee of up to 15% of the settlement, and your state’s insurance department may cap that percentage. You can also file a complaint with your state department of insurance, which investigates unfair claim-handling practices.
Example Roof Insurance Claim Timeline
| Stage | Typical Timeframe |
|---|---|
| File the claim (first notice of loss) | Day 1 |
| Adjuster inspection scheduled | 3 to 14 days after filing |
| Initial estimate and first payment | 7 to 21 days after inspection |
| Supplement review (if needed) | 7 to 30 days after submission |
| Repairs completed | Varies (days to weeks by scope) |
| Depreciation recovery payment | 7 to 14 days after final invoice |
End to end, expect 30 to 60 days for a straightforward claim. Claims involving supplements, re-inspections, or appeals can stretch to 90 days or longer, and after a catastrophic storm the adjuster backlog alone can add weeks.
Tips to Strengthen Your Roof Insurance Claim
- Keep maintenance records. Receipts for gutter cleanings, annual inspections, and past repairs prove you didn’t neglect the roof, which undercuts the most common reason for a claim denial.
- Get a pre-storm baseline inspection. In hail- or hurricane-prone areas, document the roof’s condition before storm season so an insurer can’t blame storm damage on old wear.
- Don’t sign over your claim. Some contractors offer to “handle everything” through an Assignment of Benefits, which transfers your policy rights and can limit your control. Read what you sign, and keep the claim in your own name.
- Choose your contractor carefully. Work with a licensed, insured roofer experienced in insurance restoration who writes estimates in the adjuster’s format and coordinates supplements directly. Verify the license and read actual reviews.
- Follow up in writing. After every call with your insurer, send a short email summarizing what was discussed. That paper trail protects you if the claim stalls or another party disputes the facts.
Take the First Step Toward Getting Your Roof Repaired
A roof insurance claim doesn’t have to be an uphill battle. Document thoroughly, understand your policy, meet every deadline, and work with a contractor who knows how to deal with adjusters. Those four moves will contribute most toward a successful claim.
If storm damage has left your roof compromised, Home Genius Exteriors provides free roof inspections that document storm damage in the line-item format adjusters expect. Call today to schedule your inspection and get the evidence on record while the damage is fresh.
Frequently Asked Questions
What should I do if my insurer offers a low settlement but doesn’t deny the claim?
Ask for a written explanation of how the carrier calculated pricing, quantities, and depreciation, then request a re-inspection if you believe they overlooked key areas. You can also submit a contractor-supported rebuttal with updated measurements, photos, and material specs to justify a revised scope.
Can I choose my own roofing contractor, or does the insurance company decide?
You can typically choose your own licensed contractor, even if your insurer recommends a preferred vendor. If you use the carrier’s network, ask them about the workmanship warranty terms, who handles disputes, and whether the contractor must follow the insurer’s scope or can propose changes.
What documentation helps prove the exact date the damage occurred?
Use third-party evidence that supports the loss date, such as local storm reports, news alerts, or a contractor statement tying the impacts to a specific weather event. Home security footage and time-stamped maintenance logs can further strengthen your case.
How do mortgage lenders and escrow accounts affect roof claim checks?
If you have a mortgage, the claim check may list your lender as a co-payee, which can slow access to funds until the lender’s endorsement process is complete. Contact your mortgage servicer early to find out their requirements and typical turnaround time.
What is a proof of loss, and when might I need to submit one?
A proof of loss is a formal, signed statement summarizing the damage and the amount you’re claiming, sometimes required by the policy or requested during a dispute. Follow the insurer’s exact format and deadline, since missing details or a late submission can create avoidable delays.
How can I protect myself from roofing scams after a storm?
Be cautious with door-to-door solicitors, pressure tactics, and requests for large upfront payments, especially anyone promising a specific insurance outcome. The FTC’s guidance on avoiding home-improvement scams is a good checklist: look into their license and insurance, get a detailed written contract, and avoid signing blank authorizations or broad permissions that let a contractor bill without your approval.