What Is A Drip Edge?
A roof can shed thousands of gallons of water during a single storm, and the difference between that water landing safely in your gutter or rotting out your fascia often comes down to a single strip of metal most homeowners never think about: the drip edge. This unassuming piece of flashing runs along the perimeter of your roof, yet skipping it or installing it wrong ranks among the most common (and costly) roofing mistakes.
What makes drip edge failures so destructive is the slow pace at which they happen. There’s no sudden leak to trace, no stain on the ceiling. Instead, water clings to the shingle edge, pulls back by surface tension, and runs behind the fascia a few millimeters at a time. Over months and years, that drip-by-drip infiltration softens the wood, invites rot, and eventually compromises the structure holding your roof edge in place. By the time the damage is visible from the ground, the repair bill has multiplied many times over what the missing strip of metal would have cost.
Here’s everything you should know about drip edges as one of the key parts of your roof.
What Is a Drip Edge and Why Your Roof Needs One
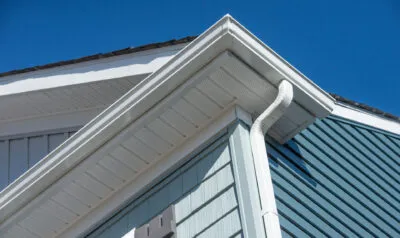
A drip edge is a metal flashing strip installed along the eaves and rakes of a roof. It directs rainwater away from the fascia board and into the gutter while preventing wind-driven rain from reaching the roof deck. Typically made of aluminum or galvanized steel, drip edge projects roughly two inches onto the roof surface and extends down over the fascia to create a clean water-shedding channel.
Without this flashing, water clings to the shingle edge through surface tension and rolls back toward the fascia. Over time, that moisture soaks into the wood, causing rot that spreads to the roof deck and even the soffit. In cold climates, the problem gets worse: ice dams trap meltwater at the edge, and a missing drip edge gives that water a direct path into the structure.
How the Drip Edge Protects Fascia, Sheathing, and Your Foundation
Drip edges deflect water, and they’re an important layer of defense in a holistic moisture-management strategy. According to WBDG’s moisture management framework, integrating drip edges into a holistic 4-Ds approach (deflection, drainage, drying, and durability) helps the entire building shell work together to keep water out and allow assemblies to dry. That framework pairs the drip edge with gutters, kick-out flashing, and wall weather-resistant barriers so water never pools against vulnerable components.
When the drip edge channels water into the gutter correctly, it also protects the foundation. Uncontrolled runoff cascading off bare shingle edges erodes soil along the foundation wall. Over years, that erosion contributes to basement leaks and settling. A $2 strip of metal now can prevent thousands in structural repairs later.
Types of Drip Edges
Drip edge flashing comes in three standard profiles, and each one handles water differently. Choosing the wrong profile for your roof setup leads to water overshooting the gutter or pooling behind the fascia. Here’s how they compare.
| Profile | Shape | Best Application | Key Advantage | Drawback |
|---|---|---|---|---|
| Type C (L-shaped) | Simple 90° bend | Budget repairs, sheds, low-wind areas | Cheapest option, easy to find | No kick-out; water can roll under |
| Type D (T-shaped) | 90° bend with a bottom kick-out flange | Most residential shingle roofs | Directs water away from fascia into gutter | Slightly higher cost than Type C |
| Type F (F-style / Gutter Apron) | Extended top flange with longer fascia leg | Reroofs, gutter-to-fascia transitions, high-wind zones | Covers wider gaps, works well with existing gutters | Bulkier profile, harder to bend at corners |
For most standard asphalt shingle roofs, Type D is the go-to profile. Its kick-out flange prevents the backflow that Type C allows, and it’s far easier to work with than Type F. Reserve Type F for reroofing projects where the old fascia has minor damage you want to conceal, or where existing gutter placement needs a longer overlap.
Type C has its place on outbuildings and budget-sensitive repairs, but we’d recommend against it on a primary residence. The money you save upfront isn’t worth the moisture risk over a 20-year shingle lifespan.
Aluminum vs. Galvanized Steel vs. Plastic Drip Edges
Aluminum dominates the residential market for good reason. It resists corrosion without coatings, weighs almost nothing, and bends cleanly around corners. For coastal homes or humid climates, aluminum is the clear winner because salt air corrodes galvanized coatings within a few years.
Galvanized steel costs slightly less per linear foot and offers greater rigidity, which matters on long eave runs where thin aluminum might waver. However, once the zinc coating wears through, rust can take hold fast. In dry inland climates, galvanized performs well and lasts 15 to 20 years before showing wear.
Plastic (PVC) drip edge exists, but it’s worth mentioning only so you know to avoid it on permanent roofing. Plastic becomes brittle under UV exposure within a few years and cracks in freezing temperatures. It belongs on temporary structures at best. Each material interacts differently with the surrounding roof components. Choosing the wrong one can accelerate corrosion at gutters, fascia boards, and underlayment connections over time.
Drip Edge Installation
The installation sequence differs depending on whether you’re working at the eave (the horizontal bottom edge) or the rake (the sloped side edge). Getting this order wrong is one of the most common contractor mistakes, and it creates a hidden leak path behind the underlayment.
At the Eaves: Drip Edge Goes Under the Underlayment
Per ARMA’s drip edge installation guidelines, a drip edge should extend a minimum of two inches onto the roof sheathing and include an outward kickout to direct water away from the fascia and supporting wood. At eave edges, you install the drip edge directly onto the bare roof deck first, then lay the underlayment on top. This layering ensures any water that penetrates the underlayment flows down onto the metal and off the roof rather than behind the fascia board.
- Nail the drip edge along the eave, placing fasteners every 12 inches along the top flange.
- Overlap pieces by at least 2 inches, moving in the direction of water flow.
- Roll out roof underlayment over the drip edge, lapping it at least 2 inches past the metal flange.
- In ice-dam-prone climates, install self-adhering ice and water shield membrane before the felt underlayment.
At the Rakes: Drip Edge Goes Over the Underlayment
The sequence reverses at rake edges. Here, the underlayment goes down first, and the drip edge lays on top. This prevents wind-driven rain from lifting the underlayment edge and pushing water sideways under the shingles.
Where a rake piece meets an eave piece at the corner, the rake drip edge overlaps on top. Water hitting the rake flashing runs down onto the eave piece and into the gutter, maintaining a continuous drainage path. Getting these overlaps backward is a tell-tale sign of sloppy workmanship.
Code Requirements, Cost, and Whether You Can Skip It
IRC Building Code R905.2.8.5
The International Residential Code section R905.2.8.5 requires drip edge on asphalt shingle roofs at both eaves and rakes. The flashing must be corrosion-resistant and extend a minimum of two inches back from the roof edge. Inspectors can and do flag missing drip edge during re-roof inspections, and some jurisdictions will require the contractor to pull shingles and retrofit it.
Can you skip it? Technically, a handful of older local codes may not enforce the IRC requirement. But doing so saves roughly $1 to $2 per linear foot of material, which adds up to maybe $150 on an average home. Gambling a $150 savings against potential fascia rot, voided shingle warranties, and failed inspections is a bad trade every time.
What Drip Edge Costs
Aluminum drip edge typically runs $1 to $3 per linear foot for materials. Galvanized steel falls in a similar range, sometimes slightly lower. A typical home with 200 to 250 linear feet of roof edge will spend $200 to $750 on materials alone. Labor during a new roof installation adds minimal cost since the roofer installs drip edge as part of the standard process. Retrofit on an existing roof costs more because the crew must carefully lift shingles and underlayment without damaging them.
If you’re budgeting for a new roof installation, the drip edge should already be included in the estimate. Ask your contractor specifically. Some lower-bid roofers omit it to appear cheaper, which saves a small fraction of the total cost while creating significant long-term risk.
How to Spot a Bad or Missing Drip Edge
Checking your drip edge doesn’t require climbing onto the roof. From ground level or a ladder at the gutter line, look for these warning signs:
- Water staining on fascia boards below the shingle edge, especially dark streaks running vertically
- Peeling paint or soft wood along the fascia or soffit
- Visible gaps between the shingle edge and gutter where no metal flashing is present
- Rust streaks or bent sections where the metal has pulled away from the roof deck
- Shingle edges curling upward at the eave, often caused by moisture wicking from below
If you spot one or two bent sections with intact metal, a targeted repair may be enough. A roofer can lift the affected shingles, reposition the flashing, and re-nail it. But if the drip edge shows widespread rust, separation from the fascia, or if your roof never had one installed, a full replacement is the move. Patching corroded metal just delays the inevitable and puts your roof maintenance plan on shaky ground.
Protect Your Roof Edge Before Water Finds the Gap
The drip edge is one of the least expensive parts of a roofing system, yet it prevents some of the most expensive damage. Whether you’re planning a reroof, inspecting a recent installation, or noticing stains on your fascia for the first time, addressing drip edge issues now saves you from dealing with rotted decking and structural repairs later.
Home Genius Exteriors, an Owens Corning Platinum Preferred Contractor, includes code-compliant drip edge installation on every roofing project and we use corrosion-resistant aluminum as our standard material. Call today for a free inspection and estimate so you know exactly where your roof stands before the next storm tests it.
Frequently Asked Questions
How does drip edge interact with different gutter styles and sizes?
The goal is consistent water capture, so the drip edge should land water inside the gutter without bouncing off the front lip. If you have small gutters, steep roof slopes, or high runoff areas, upsizing gutters or adjusting hanger placement may be needed to prevent overshoot.
What roof types or coverings may need a different drip edge approach than asphalt shingles?
Metal roofing, tile, slate, and low-slope systems often use different edge details, such as specific eave trims or gravel stops, that integrate with their own underlayment and drainage methods. Always match the edge flashing to the roof system manufacturer requirements to avoid warranty and leak risks.
Can drip edges help prevent pest and insect entry at the roofline?
It can reduce gaps at the roof edge that allow insects and small pests to access fascia and roof decking. It’s not a complete pest barrier though, so pair it with proper soffit ventilation screens and sealed fascia transitions for better protection.
What are common corner and seam mistakes that cause leaks even when a drip edge is installed?
Leaks often start at corners where pieces are poorly mitered, over-bent, or left with open joints that funnel water behind the fascia. Clean cuts, tight folds, and sealed, directionally correct laps at transitions are key to keeping water moving outward.
Should the drip edge be replaced when you replace gutters?
Not always, but it’s worth evaluating because gutter replacement exposes the fascia line and can reveal hidden corrosion or improper alignment. If the metal is bent, short, or directing water behind the gutter, replacing it during gutter work can prevent redoing labor later.
How do I choose the right drip edge color and finish for curb appeal and longevity?
Use factory-finished, coil-coated metal that matches your fascia trim or gutter color for a cleaner look and better fade resistance. Avoid field painting bare metal unless the product is designed for it, because poor adhesion can peel and expose the substrate to corrosion.
What should I ask a roofing contractor to confirm the drip edge will be installed correctly?
Ask which profile and metal thickness they use, whether they replace all perimeter edge metal or only damaged sections, and how they handle corners and gutter integration. Request that drip edge be listed as a line item in the estimate and confirm it will pass local inspection requirements.