The Different Parts of a Roof
Your roof is a layered system where every component plays a specific role in protecting your home from water, wind, heat, and cold. When one component fails, it can trigger a chain reaction that damages other parts of the roof.
We’re going to break down each major roof element, explain what it does, identify common problems, and give you a clear maintenance framework so you can stay ahead of costly surprises.
The Anatomy of a Roof
Before defining the individual components, it helps to see the roof as an integrated system rather than a collection of disconnected parts. Every roof follows a basic hierarchy:
- Structural framing that supports the roof deck
- Protective layers that shield against moisture
- An outer covering that deflects weather
- Edge and drainage components that channel water safely away from the home.
The table below provides an overview of each major roof component, its function, and where it sits within this system. Use it as your starting point, then read each detailed section for maintenance tips and failure signs.
| Component | Category | Primary Function | Common Materials |
|---|---|---|---|
| Rafters / Trusses | Structural Frame | Bear the weight of the entire roof system | Dimensional lumber, engineered wood |
| Decking (Sheathing) | Structural Base | Creates a solid surface for all upper layers | Plywood, OSB, plank boards |
| Underlayment | Protective Layer | Secondary moisture barrier beneath shingles | Synthetic, felt, ice-and-water shield |
| Shingles / Covering | Exposure Layer | First line of defense against weather | Asphalt, metal, tile, slate, wood |
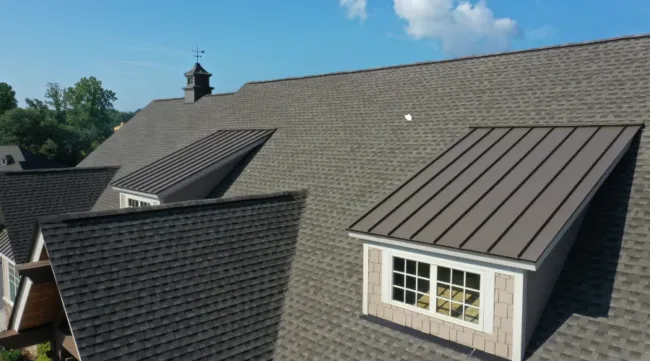
| Flashing | Transitions | Seals joints, valleys, and penetrations | Galvanized steel, aluminum, copper |
| Ridge / Ridge Vent | Peak / Ventilation | Caps the roof peak and exhausts hot air | Metal, shingle-over ridge vent |
| Fascia | Edge Trim | Protects rafter ends and supports gutters | Wood, aluminum, PVC composite |
| Soffit | Edge Trim / Ventilation | Encloses the underside of eaves, allows airflow | Vinyl, aluminum, wood |
| Gutters / Downspouts | Drainage | Collects and redirects rainwater away from foundation | Aluminum, copper, vinyl, steel |
| Eaves / Drip Edge | Edge Protection | Prevents water from wicking back under roofing | Metal flashing strip |
Structural Parts of a Roof
The frame is the foundation of your entire roofing system. Without sound framing and decking, no amount of premium shingles or flashing will protect your home. These components are typically hidden from view, which means damage can go undetected for years.
Rafters and Trusses
Rafters are individual beams that run from the peak of the roof down to the eaves, supporting the weight of every layer above them. Trusses serve the same purpose but use a pre-engineered triangular framework that distributes loads more efficiently. Most modern homes use trusses because they span wider distances without requiring load-bearing walls inside.
Common problems include cracking from excessive snow loads, sagging caused by long-term moisture exposure, and insect damage in humid climates. You should schedule a professional attic inspection every three to five years to check for bowing, splitting, or signs of wood rot in your framing.
Roof Decking and Sheathing
Decking, also called sheathing, creates the flat surface that every protective layer attaches to. Plywood and oriented strand board (OSB) are the two most common materials. Plywood handles moisture slightly better and recovers faster after minor exposure, while OSB costs less and offers consistent structural performance in dry conditions. Older homes may still have original plank board decking.
Signs of decking failure include a spongy feel when you walk on the roof, visible sagging between rafter lines, and water stains on attic ceiling boards. Most building codes require a minimum 7/16-inch thickness for OSB or 15/32-inch for plywood, though many contractors recommend going thicker in snow-prone regions. During a full roof replacement, your contractor will inspect the decking and replace any compromised sections before installing new materials.
The Roof’s Protective Layers and Outer Covering
Sitting on top of the structural deck, these layers form your roof’s active weather defense system. They work together in a specific sequence: underlayment goes down first as a safety net, then the primary covering deflects rain, hail, UV rays, and wind.
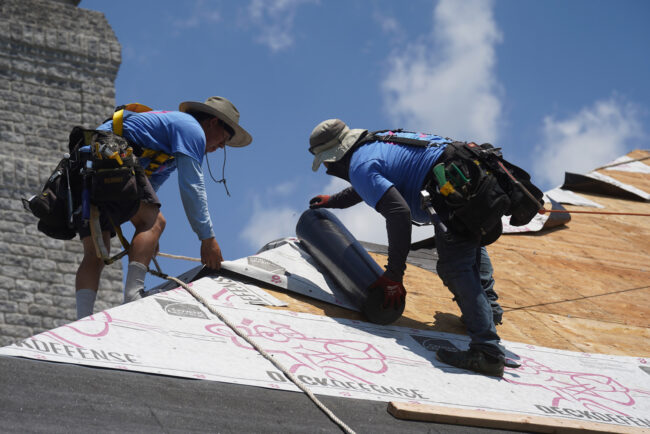
Underlayment: The Hidden Moisture Barrier
Underlayment is a sheet material installed directly over the decking before shingles go on. It serves as a secondary water barrier if wind-driven rain or ice dams push moisture beneath the shingles. Three main types exist: traditional asphalt-saturated felt, synthetic underlayment (which is lighter and more tear-resistant), and self-adhering ice-and-water shield used in high-risk areas like valleys and eaves.
In cold climates, building codes often require ice-and-water shield along the first two to three feet of the eave line to prevent ice dam damage. The IBHS FORTIFIED Home program now specifies enhanced underlayment and sealed penetrations as mandatory standards for storm-resistant roof assemblies, giving homeowners a benchmark when evaluating contractors.
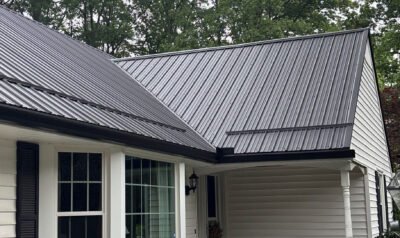
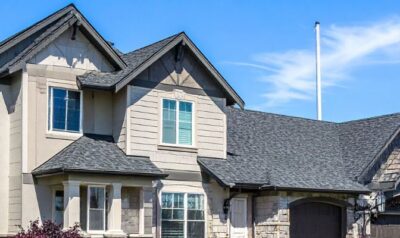
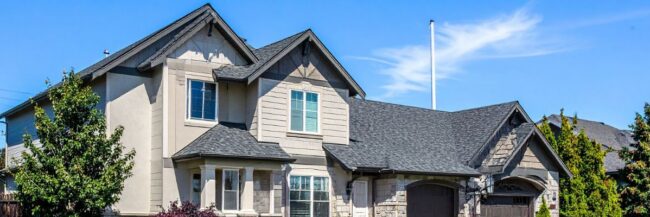
Shingles and Roof Coverings
Shingles are what most people picture when they think about parts of a roof. Asphalt shingles dominate the residential market because they balance cost, durability, and aesthetic versatility. Architectural (dimensional) shingles outperform traditional three-tab shingles in both wind resistance and lifespan, typically lasting 25 to 30 years with proper ventilation.
Other covering options include metal panels (40 to 70 year lifespan), clay or concrete tile (50-plus years), slate (75 to 100-plus years), and wood shakes. Each material has its own weight requirements, installation methods, and climate considerations. Common shingle problems include curling, cracking, granule loss, and moss or algae growth in humid environments.
If your shingles show widespread granule loss or your roof is approaching its rated lifespan, prioritize a professional inspection.
Edge Components, Flashing, and Drainage
Most leaks originate in the edges and transitions of your roof. These components handle the critical job of sealing gaps, directing water flow, and protecting vulnerable intersection points where different roof planes or materials meet.
Flashing: Sealing Your Roof’s Weak Points
Flashing consists of thin metal pieces installed at every joint, valley, and penetration point on your roof. You’ll find it around chimneys, vent pipes, skylights, dormers, and where the roof meets a sidewall. Step flashing, counter flashing, and valley flashing each serve specific purposes, and failure at any of these points typically leads directly to interior water damage.
Rust, cracked sealant, and lifting edges are the most common flashing problems. Many homeowners overlook flashing during visual inspections because it blends in with surrounding materials. Check your roofing system’s flashing annually, especially after severe storms, and address any sealant deterioration before it allows moisture behind the covering layer.
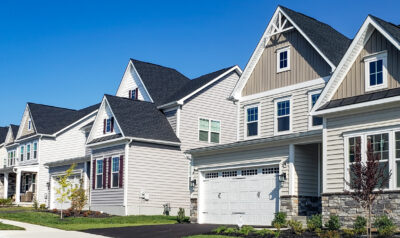
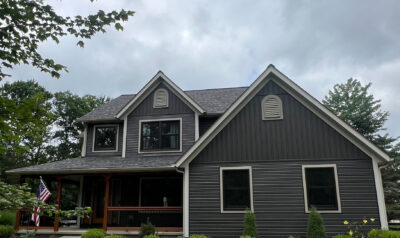
Fascia, Soffits, and Eaves
Fascia boards run along the lower edge of the roof, capping the exposed ends of rafters and providing the mounting surface for your gutter system. Soffit panels enclose the underside of the eave overhang, and vented soffits play an important role in attic airflow by drawing cool air upward through the attic space and out through ridge vents.
Wood fascia is particularly vulnerable to rot when gutters overflow or when paint seals fail. Aluminum and PVC composite options resist moisture far better and require less maintenance. If you notice peeling paint, soft spots, or visible water damage along your roofline, these edge components likely need attention.
Gutters and Downspouts
Your gutter system collects rainwater from the roof surface and channels it through downspouts away from your foundation. Clogged, sagging, or improperly pitched gutters cause water to pool along the eave line, accelerating fascia rot and potentially allowing moisture to seep behind the drip edge.
Clean gutters at least twice per year, in spring and late fall. Check for proper slope (gutters should drop roughly 1/4 inch per 10 feet toward each downspout), and ensure downspout extensions direct water at least four feet from the foundation. Seamless aluminum gutters reduce leak-prone joints and represent the most popular upgrade for homeowners replacing aging systems.
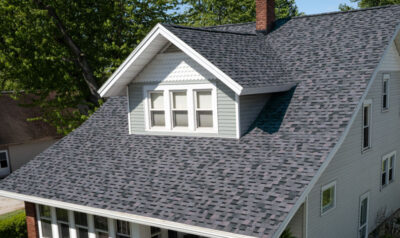
Ventilation and Ridge Components
Proper attic ventilation extends the life of nearly every other roof component. Without adequate airflow, heat and moisture build up in the attic space, accelerating shingle deterioration from underneath and promoting mold growth on decking and framing.
The ridge (the horizontal peak where two roof slopes meet) serves double duty. Ridge cap shingles seal this vulnerable seam against wind-driven rain, while ridge vents integrated beneath the cap allow hot, moist air to exhaust naturally. This system works in tandem with soffit intake vents, creating continuous airflow that regulates temperature and humidity year-round.
Most building codes recommend a 1:150 ventilation ratio (one square foot of net free vent area per 150 square feet of attic floor) as a baseline standard.
Your Seasonal Roof Maintenance Checklist
Consistent maintenance catches small issues before they become expensive repairs. Use this seasonal framework to protect every part of your roof system throughout the year.
Spring:
- Inspect shingles from the ground with binoculars for curling, cracking, or missing pieces
- Clean gutters and downspouts, check slope and connections
- Look for winter storm damage around flashing, ridge caps, and eave lines
- Trim tree branches hanging within six feet of the roof surface
Fall:
- Clear debris from gutters, valleys, and around roof penetrations
- Check attic for daylight penetration, water stains, or musty odors
- Make sure soffit vents are unblocked by insulation or debris
- Inspect caulk and sealant around vent pipes, skylights, and chimney flashing
Every 3 to 5 Years (Professional Inspection):
- Inspect shingle condition at close range
- Evaluate decking and structural framing from inside the attic
- Check flashing integrity at all penetrations and transitions
- Inspect ventilation performance to confirm adequate airflow
Protect Every Part of Your Roof Before Problems Multiply
From the hidden trusses in your attic to the shingles exposed to daily weather, each part of your roof contributes to a single mission: keeping your home dry, comfortable, and structurally sound. Neglecting one component could turn into a major replacement project.
Bookmark this guide as your ongoing reference. Schedule your seasonal inspections and address warning signs early. When you need a professional assessment, contact Home Genius Exteriors today for a free inspection and estimate. Our team evaluates every layer of your roofing system and can help you move forward confidently with your home improvement plans.
Frequently Asked Questions
How can I tell if a roof issue is an urgent leak risk or something that can wait?
Treat any active dripping, new ceiling discoloration, or damp insulation as urgent, because moisture can spread quickly through hidden layers. If you notice exterior wear (like cracked or missing shingles, granule loss, or damaged flashing) but no signs of moisture inside, schedule a non-emergency inspection soon to confirm there isn’t any concealed damage.
What should I ask a roofing contractor during an inspection to make sure I get an honest assessment?
Ask for photos from key areas, including penetrations, valleys, and the attic side of the roof, plus a written scope that separates repairs from recommended upgrades. Request clear criteria for a roof replacement versus repair, and confirm what’s included in cleanup, disposal, and the final walkthrough.
How do roof warranties typically work, and what can void them?
Most warranties split into materials coverage (manufacturer) and workmanship coverage (installer), and each has its own terms. Common issues that can reduce coverage include improper ventilation, unapproved modifications, or repairs done by unqualified installers. Find out what your contractor’s warranties cover, and how long their warranties last.
Do I need a permit to repair or replace my roof?
Many municipalities require permits for full replacements, sometimes for structural repairs, and may not for minor repairs. Your contractor should pull permits as needed and schedule inspections, but homeowners can verify requirements with the local building department.
What’s the best way to prepare my home and property before a roofing project starts?
Move vehicles away from the work zone, protect items in the attic from dust, and secure fragile valuables on upper floors to reduce vibration-related damage. Plan for noise, pets, and access to power outlets, and confirm where debris and materials will be staged.