New Roof Installation: The Complete Step-by-Step Guide for Homeowners
Nothing hits quite like a new roof. From refreshed curb appeal to a significant increase in property value, it’s an exciting transformation. On the other hand, the process can be loud, intrusive, and cost a good chunk of change. But once you know what to expect during a new roof installation, you’ll find the concept is less intimidating than it might seem at first.
This guide walks you through every stage of a roof replacement, from recognizing end-of-life warning signs to inspecting the finished product after the crew leaves. A new roof is a major investment, but once you understand the cost breakdown and know how to find a contractor you can trust, you’ll have more confidence and a sense of control over the project.
Warning Signs You Need a New Roof
Catching problems early saves thousands of dollars, but many homeowners confuse cosmetic wear with structural failure. Before you start calling contractors, evaluate your roof against these common indicators:
Visible Damage and Age
Asphalt shingles typically last 20 to 30 years, depending on ventilation, climate, and product quality. If your roof is approaching or past that range, replacement is often less expensive than repeated repairs. Look for curling, cracking, or missing shingles (especially after storms) as these expose the underlayment to water intrusion.
Granule loss is another red flag. Check your gutters for gritty sediment after rainfall. Excessive granule shedding means shingles have lost their protective coating and can no longer properly deflect UV rays.
Interior and Structural Red Flags
Head to your attic with a flashlight. Daylight peeking through the roof boards, sagging decking, or dark stains on rafters all point to moisture penetration that you can’t solve with a surface repair. On the exterior, watch for moss or algae growth, damaged flashing around chimneys and vents, and a roofline that visibly sags or dips.
If you spot three or more of these issues simultaneously, a full roof replacement almost always makes more financial sense than patching isolated problem areas. A qualified inspector can confirm whether you’re dealing with localized damage or systemic failure.
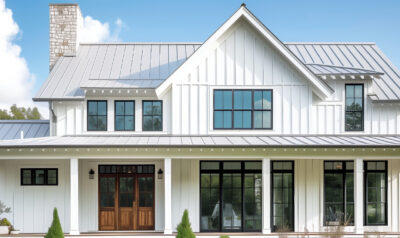
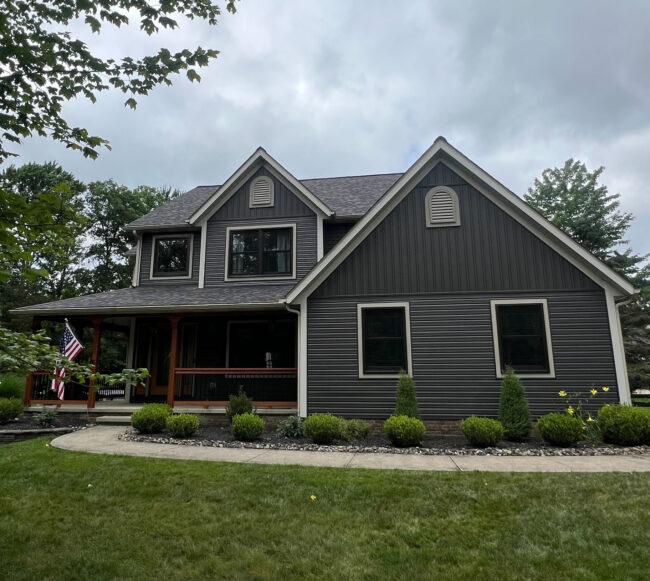
Choosing Roofing Materials for Your New Roof Installation
Material selection shapes everything from your home’s curb appeal to its long-term maintenance costs. The best choice depends on your climate, budget, architectural style, and how long you plan to stay in the home. Below is a side-by-side comparison of the most common residential roofing materials.
| Material | Cost per Sq Ft | Lifespan | Maintenance | Best Climate Fit |
|---|---|---|---|---|
| 3-Tab Asphalt | $3.50–$5.50 | 15–20 years | Low | Moderate / temperate |
| Architectural Asphalt | $4.50–$8.00 | 25–30 years | Low | All climates |
| Standing Seam Metal | $8.00–$14.00 | 40–70 years | Very low | Snow, coastal, high wind |
| Clay/Concrete Tile | $10.00–$18.00 | 50–100 years | Moderate | Hot, dry, or Mediterranean |
| Slate | $15.00–$30.00 | 75–150 years | Low | All climates (heavy) |
| Synthetic Composite | $7.00–$12.00 | 30–50 years | Low | All climates |
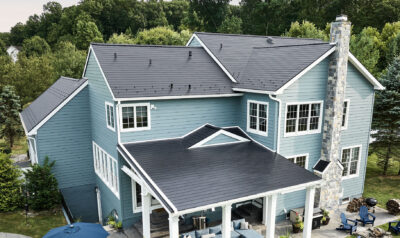
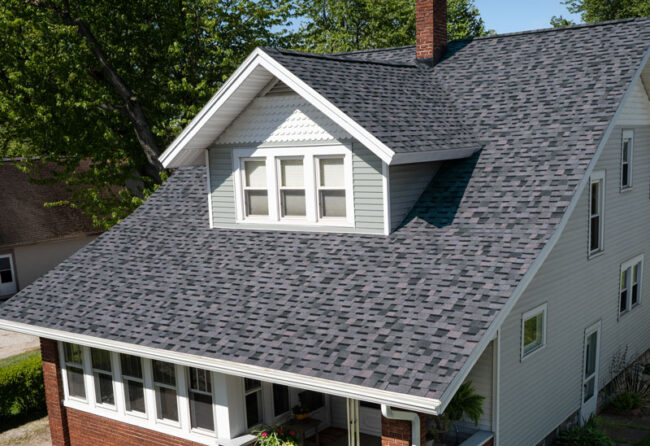
Architectural asphalt shingles dominate the market for good reason: they’re relatively affordable, look great, and last longer than three-tab shingles.
Homeowners in high-wind or hurricane-prone areas should consider products that meet FORTIFIED Home specifications as these FORTIFIED roofs can yield a huge drop in storm damage insurance claims, which means an upfront premium can save you money and frustration down the road.
The New Roof Installation Process
While materials and roof design may vary, the fundamental steps for a residential roof installation are largely the same from preparation to final inspection. Knowing what to expect can help you prepare for the project and make sure everything goes smoothly.
1. Pre-Installation (Preparation)
Your contractor will conduct a thorough inspection, take measurements, and present a detailed estimate that itemizes labor, materials, disposal, permits, and any anticipated decking repairs. Once you approve the scope, the contractor should obtain the necessary building permits. Permit requirements vary by municipality, but many jurisdictions require them for full replacements and will schedule inspections at key milestones.
As a homeowner, you should complete your own prep checklist before the crew arrives:
- Move vehicles out of the driveway and away from the house perimeter
- Relocate patio furniture, grills, and potted plants at least 15 feet from exterior walls
- Secure or remove fragile items in the attic (vibrations from tear-off can knock things loose)
- Notify neighbors about expected noise and temporary debris
- Arrange a safe space for pets and small children away from the work zone
2. Roof Tear-Off and Decking Inspection
The crew strips existing shingles, underlayment, and compromised flashing down to the roof deck. This is the most revealing stage because hidden damage to the plywood sheathing only becomes visible once they’ve removed the old materials. Expect your contractor to flag any rotted or delaminated decking panels and provide a replacement cost.
Make sure the crew is following proper disposal protocol. Reputable contractors use tarped dump trailers or roll-off dumpsters positioned to protect your landscaping, and they run magnetic sweeps across your yard to collect stray nails at the end of each workday.
3. Underlayment, Flashing, and Ventilation
These three components form the hidden backbone of a durable roof system, and cutting corners on any of them dramatically shortens the lifespan of the materials above. The crew installs an ice-and-water shield in valleys, along eaves, and around penetrations, followed by an underlayment across the remaining deck surface.
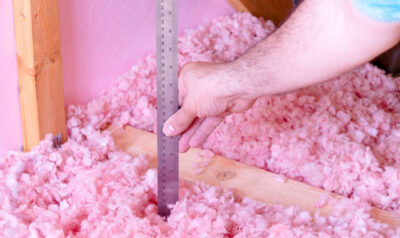
Metal flashing goes around every chimney, vent pipe, skylight, and wall junction. Ventilation, often the most overlooked element, balances airflow between soffit intakes and ridge or box vents. Poor ventilation traps heat and moisture in the attic, which voids many manufacturer warranties and accelerates shingle degradation.
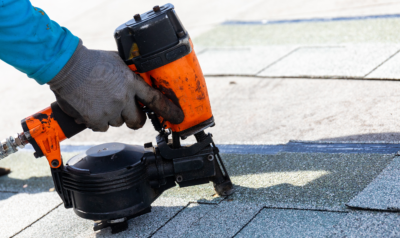
4. Shingle/Material Application
Shingle installation starts at the eave line and works upward in overlapping courses. Each shingle is fastened with a specific nail pattern, typically four to six nails per shingle, dictated by the manufacturer’s specifications and local wind-zone requirements. The crew installs hip and ridge caps last, sealing the roof’s most vulnerable seams.
Quality control during this phase includes checking for consistent exposure lines, looking for proper nail depth (they should be flush with the surface, not overdriven or underdriven), and making sure starter strips and drip edge are properly seated.
5. Cleanup and Final Inspection
A thorough cleanup should leave your property looking better than when the crew arrived. This includes magnetic sweeps of the entire yard to pick up any fallen nails, gutter clearing, and removal of all packaging and debris. Your municipality may require a final building inspection before the permit closes, confirming the installation meets current code.
Walk the property with your contractor and double check the following before signing off:
- Flashing is sealed and properly integrated with surrounding materials
- All vents, boots, and penetrations are intact and caulked
- Gutters and downspouts are clear and reattached
- No exposed nails or lifted shingles are visible from ground level
- Attic inspection reveals no daylight or debris
How Much Does A New Roof Cost?
Budget surprises can derail more roofing projects than bad weather. The cost of your new roof installation depends on several factors, like the type of roofing material, the size of the home, the complexity of the roof, local labor rates and permits. These factors also determine how long the project will take.
For a typical 2,000-square-foot home with a standard-pitch roof, expect total costs to fall between $8,000 and $18,000 for architectural asphalt shingles, while 3-tab shingles usually range from $7,000 to $13,000. Metal roofs can run you $15,000–$30,000, while slate or tile can exceed $40,000. The table below breaks down the major line items:
| Cost Component | Typical Range | % of Total |
|---|---|---|
| Roofing materials (shingles, underlayment, flashing) | $3,500–$8,000 | 40–45% |
| Labor | $3,000–$6,000 | 35–40% |
| Tear-off and disposal | $1,000–$2,000 | 10–12% |
| Decking repairs (if needed) | $500–$1,500 | 5–8% |
| Permits and inspections | $200–$500 | 2–3% |
Steep pitches, multi-story homes, complex rooflines with many valleys or dormers, and limited access all push costs higher, but can also contribute to the length of your project’s timeline.
How Long Does a New Roof Installation Take?
Most residential roof replacements take one to three days: think basic asphalt shingle job on a single-story home. Larger, steeper, or more complex roofs may extend to four or five days. That said, weather delays, unexpected decking damage, and permit-related hold-ups are the most common causes of schedule overruns.
Book your project well in advance, ideally before spring, to get the best selection of qualified crews and give them enough time to order materials and complete the work on your ideal schedule.
Hiring the Right Roofing Contractor
The one thing that matters more than your choice of roofing material is the crew installing it. A premium shingle installed incorrectly will fail faster than an economy product installed by a skilled team. Use this screening checklist when you’re hiring a roofing contractor:
- Licensing and insurance: Make sure they have an active state or local contractor license and both general liability and workers’ compensation coverage.
- Manufacturer certifications: Certified contractors (such as Owens Corning Platinum Preferred) meet rigorous training and quality standards, and they unlock extended warranty options that uncertified installers can’t access.
- Written, itemized estimate: Refuse any bid that lumps everything into a single line. Make sure there are separate line items for material specs, labor hours, disposal fees, and warranty terms.
- Local references and reviews: Request at least three recent local references and cross-check online review platforms for patterns of praise or complaint.
- Permanent local presence: A physical office and familiar project managers who see your job through from start to finish indicate a contractor invested in the community, not a storm-chasing crew that disappears after cashing the check (and likely leaving you with a bad roofing job).
Ask every candidate how they handle unexpected decking damage, what their daily cleanup process looks like, and whether they pull their own permits or expect you to handle that step. The answers reveal operational quality as much as any certification does.
Post-Installation Roof Care
A new roof requires minimal maintenance, but ignoring it entirely shortens its lifespan. Schedule a visual inspection from ground level every six months and after any significant storm. Keep gutters clear, trim overhanging branches that could scrape or puncture shingles, and address minor issues like a popped nail or a shifted vent boot immediately before they become leak sources.
Warranty Protection
Manufacturer warranties cover material defects, while workmanship warranties cover installation errors. System warranties, available through certified contractors, combine both into a single package. Keep your warranty documentation in a safe place, and note any stipulations around required maintenance. Failing to maintain adequate attic ventilation, for example, voids most manufacturer warranties.
Avoid These Common Roof Replacement Mistakes
The most expensive errors tend to take place before work begins, but they can happen at any time. Here are some of the biggest mistakes a homeowner can make with a new roof installation:
- Choosing a contractor based solely on the lowest bid
- Skipping the permit process
- Failing to get a written scope of work
- Making verbal agreements on changes to the project without a written addendum in the contract
After installation, don’t pressure wash asphalt shingles, walk on your roof unnecessarily, or ignore your attic ventilation. Each of these actions accelerates wear and can void your warranty coverage.
Take Control of Your Project
A successful new roof installation starts with informed decision-making and ends with a product that protects your home for decades. You now know how to spot the signs of roof failure, compare materials, understand every phase of the installation process, budget accurately, and vet contractors like a professional.
When you’re ready to move forward, Home Genius Exteriors makes the process easy. As an Owens Corning Platinum Preferred Contractor, we deliver certified installations backed by extensive warranties that cover both labor and materials. Call us today for a free inspection and estimate, and take the first step toward finally getting your new roof installed.
Frequently Asked Questions
Should I consider adding insulation or upgrading my attic setup during a roof replacement?
Yes, a roof replacement is an ideal time to evaluate attic insulation levels, air sealing, and moisture control, because you’ll already be opening up the roof and having a contractor access the attic space. Ask your roofer to flag any attic issues they notice, then consider a separate energy audit or insulation expert to confirm the best plan for an upgrade.
What questions should I ask about financing or payment terms before signing a roofing contract?
Ask whether the contractor offers financing, what interest rates and fees apply, and whether there’s a prepayment penalty. Also confirm the payment schedule, avoid paying the full amount upfront, and make sure your final payment is tied to a documented completion checklist.
How can I make sure my landscaping and exterior surfaces are protected during the project?
Request a written plan that includes plant coverings, plywood protection for delicate areas, and where the crew will stage materials and debris. If you have sprinklers, lighting, or fragile hardscaping, walk the perimeter with the project manager to identify risks before work begins.
Do I need to notify my homeowners insurance company before or after replacing the roof?
You should notify your insurer before work starts if you’re filing a claim, and after completion if you want your policy records updated. Provide the final invoice, permit closure (if applicable), and product documentation, because some carriers adjust premiums or coverage based on roof age and material.
What documentation should I collect for resale value and future warranty claims?
Keep a digital folder with the signed contract, proof of payment, manufacturer product details, warranty certificates, permit paperwork, and photos from key milestones. This documentation helps with warranty transfers, insurance questions, and buyer due diligence if you sell the home.
How do I compare roofing bids when contractors propose different systems or brands?
Standardize the comparison by asking each bidder to quote the same scope, including underlayment type, flashing approach, ventilation plan, and cleanup details. Then evaluate total value by factoring warranty coverage, crew experience, and what is excluded, not just the bottom-line price.
What steps should I take if I notice an issue after the crew leaves, like a small leak or a loose piece of trim?
Document the issue with photos and notes on when it happened, then contact the contractor in writing and request a service visit. Avoid DIY fixes that could complicate or void warranty coverage, and keep all communication and repair records in case you need to escalate things.