Roof Underlayment: Types, Installation, and Why It Matters
The right roof underlayment could be the difference between a roof that lasts decades and one that fails within years. This hidden layer sits between your roof deck and your shingles, tiles, or metal panels, and it serves as the last line of defense against moisture, wind-driven rain, and ice damage that can sneak under your outer roofing material.
Most homeowners never see their underlayment after installation day, yet this single component influences everything from energy efficiency to warranty coverage. Whether you’re planning a full roof replacement or evaluating a contractor’s proposal, avoid making costly mistakes and make sure you have the right underlayment for your roof.
What Is Roof Underlayment?
Roof underlayment is a water-resistant or waterproof barrier material installed directly onto your roof deck before the primary roofing cover goes on. Think of it as a secondary shield. Your shingles or metal panels handle the brunt of weather exposure, but underlayment catches whatever slips through, whether that’s wind-driven rain, condensation, or snowmelt creeping under flashings.
Beyond moisture protection, underlayment plays a vital role in your roof’s overall performance. It also contributes to fire resistance ratings and, depending on the type, can improve your roof’s ability to manage vapor diffusion, which prevents trapped moisture from rotting the deck from the inside out.
Your roof is a layered system, not just shingles on wood. From bottom to top, the parts of your roof include the structural deck (plywood or OSB), underlayment, ice and water shield at vulnerable areas, and finally the outer roofing material. Each layer has a specific job, and skipping or downgrading the underlayment compromises the entire system.
It’s worth noting that underlayment isn’t the same as housewrap, vapor barriers, or radiant barriers. Housewrap protects walls, not roofs. Vapor barriers manage moisture diffusion in wall assemblies. Radiant barriers reflect heat in attic spaces and sometimes complement underlayment but serve an entirely different function. Confusing these products leads to improper material selection and potential roof failure.
Comparing Types of Roof Underlayment
The best underlayment for your roof depends on your budget, climate, roof design, and the primary roofing material you’re installing over it. There are three main categories of underlayment, and each brings distinct advantages and trade-offs that both homeowners and contractors should consider before installation.
Asphalt-Saturated Felt Underlayment
Asphalt-saturated felt (commonly called “tar paper” or “felt paper”) has been the industry standard for over a century. Available in 15-pound and 30-pound weights, it consists of a cellulose or fiberglass mat saturated with asphalt for water resistance. It’s affordable, widely available, and accepted under virtually every building code.
However, felt has limitations. It tears relatively easily during installation, absorbs moisture over time, and wrinkles in heat. Its UV exposure tolerance is typically limited to 30 to 90 days, meaning delayed roofing installations risk degraded underlayment. For budget-conscious projects in mild climates, 30-pound felt remains a viable option, but it’s increasingly being replaced by synthetic alternatives on premium jobs.
Synthetic Roofing Underlayment
Synthetic underlayment, made from woven or spun polypropylene or polyethylene, has rapidly gained market share over the past two decades. It’s lighter, stronger, and more resistant to tearing and moisture than felt. Most synthetic products offer superior walkability and slip resistance, which improves installer safety on steep slopes.
Synthetic underlayment also handles UV exposure significantly better than felt, with many products rated for up to six months of direct exposure. This has significant consequences when construction timelines extend unexpectedly; for example, if the selected shingles are back-ordered or there’s a delay in their delivery.
The trade-off is cost: synthetic products typically run two to three times the price of felt per square (100 square feet of coverage). Still, many contractors and homeowners consider it a worthwhile investment given its durability and performance.
Rubberized Asphalt (Self-Adhered) Underlayment
Rubberized asphalt underlayment, often called “peel-and-stick” or “ice and water shield,” is a self-adhering membrane that creates a fully waterproof seal. Unlike felt and synthetic products that are water-resistant, rubberized asphalt is truly waterproof because it bonds directly to the roof deck and seals around nail penetrations.
This premium product is necessary in high-risk zones: eaves, valleys, around skylights, chimney flashings, and any area prone to ice dams or ponding water. Building codes in cold-climate regions frequently require rubberized asphalt along eaves where ice dams are common. Its cost is the highest of all three types of underlayment, but in vulnerable roof areas, nothing else provides equivalent protection.
Side-by-Side Underlayment Comparison
The table below compares different underlayment types and their performance characteristics:
| Feature | Asphalt-Saturated Felt | Synthetic | Rubberized Asphalt |
|---|---|---|---|
| Material | Cellulose/fiberglass + asphalt | Polypropylene or polyethylene | Rubberized asphalt + polymer film |
| Water Protection | Water-resistant | Water-resistant | Fully waterproof |
| Tear Resistance | Low to moderate | High | Moderate to high |
| UV Exposure Limit | 30–90 days | Up to 6 months | 30–90 days (varies) |
| Walkability/Slip Safety | Poor when wet | Good to excellent | Moderate |
| Cost per Square | $15–$30 | $40–$70 | $80–$150+ |
| Lifespan | 15–20 years | 25–40+ years | 25–40+ years |
| Best Use Case | Budget projects, mild climates | Most residential roofs | Eaves, valleys, ice-dam zones |
The Best Roof Underlayment for Your Climate
Climate should drive your underlayment decision more than any other factor. A product that performs perfectly in the dry Southwest may fail catastrophically in the snowbelt or along a hurricane-prone coast. Regional building codes often reflect these realities, but codes set minimum standards, not optimal ones.
Cold-Climate and Snow Regions
Ice dams form when heat escaping from the house warms the roof, melting snow from underneath. This water trickles down toward the colder eaves, where it refreezes and creates a blockage. Trapped behind the dam, water can then back up under the shingles and penetrate the roof deck.
To prevent this, building codes in colder zones often require a rubberized asphalt underlayment along eaves and valleys. Extending this protective layer beyond the code minimum provides even greater security. For a complete solution in cold climates, the underlayment choice must work in tandem with an effective ventilation strategy.
Hurricane and High-Wind Zones
Coastal and hurricane-prone regions require underlayment that won’t blow off during installation or fail under sustained wind-driven rain. Self-adhered synthetic or rubberized products outperform mechanically fastened felt in these conditions because they don’t rely solely on staples or nails that can pull through during uplift events.
Many coastal codes now require enhanced underlayment specifications, including sealed seams and increased overlap widths.
Hot and Arid Climates
In high-UV, high-heat climates, you’ll need a carefully selected underlayment. Traditional asphalt felt is the worst option, as heat and UV exposure can cause it to dry out, become brittle, and crack.
The best choice is a high-quality synthetic underlayment made from heat- and UV-resistant polymers. When choosing one, look for a high temperature rating (e.g., stable up to 250°F) and a strong UV rating (e.g., 180-day exposure).
For superior waterproofing, a high-temperature self-adhered membrane is an excellent choice, as it bonds directly to the roof deck to seal around fasteners. Make sure it’s specifically formulated for high-heat applications.
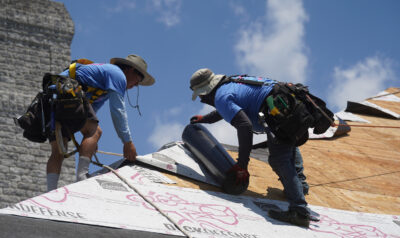
Roof Underlayment Installation
Proper installation technique matters as much as material selection. Even the best synthetic underlayment will fail if laps are insufficient, fasteners miss the mark, or penetrations remain unsealed.
A contractor will start the process by confirming the roof deck is clean, dry, and structurally sound. Any damaged plywood or OSB panels should be replaced before underlayment goes down. From there, the installation follows a bottom-up sequence.
- Install ice and water shield first at eaves, valleys, and around penetrations (chimneys, vents, skylights) per code requirements.
- Roll underlayment horizontally starting at the eave edge, working upward toward the ridge.
- Maintain proper overlap: 4-inch horizontal overlaps and 6-inch end-lap overlaps minimum (check manufacturer specs for exact requirements).
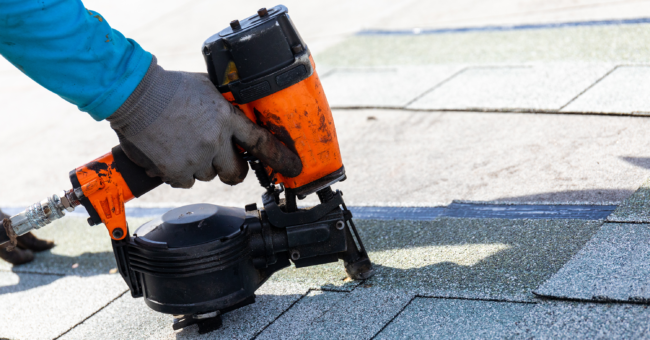
- Fasten according to product specifications using cap nails or staples at recommended intervals, typically 6 to 12 inches along edges and 12 to 24 inches in the field.
- Seal all penetrations and transitions with compatible roofing sealant or flashing tape.
- Extend underlayment over the ridge for continuous coverage across the peak.
The NRCA Roofing Manual provides more detail on these procedures, outlining the industry’s best practices for quality installation.
Common Underlayment Installation Mistakes
Even experienced crews can make mistakes that compromise underlayment performance. Knowing where to find the potential for error will help you inspect work quality and prevent future problems.
- Insufficient overlap: Cutting overlap short by even an inch creates channels for water entry. Always meet or exceed manufacturer minimums.
- Wrong fastener type or spacing: Staples alone often don’t meet wind-uplift requirements. Cap nails provide greater holding power and reduce tear-through risk.
- Leaving underlayment exposed too long: Exceeding the manufacturer’s UV exposure limit degrades the material before shingles even go on. Track installation timelines carefully.
- Ignoring penetration details: Unsealed areas around pipes, vents, and skylights are the most common leak sources on any roof.
- Installing over a wet deck: Trapping moisture under underlayment accelerates deck rot and mold growth.
Cost, Durability, and Long-Term Value
Underlayment costs represent a small fraction of your total roofing project investment, but the wrong choice can lead to expensive repairs down the road. Material costs range from around $15 per square for basic felt to over $150 per square for premium rubberized products. Labor costs stay relatively consistent regardless of type, though synthetic underlayment’s lighter weight and better walkability can speed up installation.
When you compare lifecycle value, synthetic and rubberized roof underlayments often win despite higher upfront costs. Their 25- to 40-year lifespans align with or exceed the life of most roofing materials, meaning you’re unlikely to need replacement before the next re-roof. Felt, with a 15- to 20-year lifespan, may degrade before your shingles do, creating hidden moisture problems that surface as ceiling stains or deck rot.
Maintaining Your Roof Underlayment
You can’t inspect underlayment directly without removing roofing material, but you can watch for signs that it’s failing. Water stains on ceilings, musty odors in the attic, sagging deck sheathing, and visible moisture on rafters all point to underlayment breakdown or improper installation.
Schedule professional roof inspections at least once a year and after major storms. A qualified contractor can identify early warning signs and assess whether underlayment issues are localized (repairable) or widespread (requiring full replacement). During any re-roofing project, always tear off old underlayment rather than layering new material over the degraded product. Covering compromised underlayment traps existing moisture and accelerates deck deterioration.
For homeowners evaluating contractor proposals, ask specifically what roof underlayment type is included in the quote and confirm it meets current building code requirements for your region. Contractors who gloss over underlayment details or default to the cheapest option may be cutting corners that cost you thousands later.
Your roof underlayment works behind the scenes, but its impact on your home’s protection, energy efficiency, and long-term maintenance costs is anything but invisible. Match your underlayment type to your climate, roof design, and budget, and insist on proper installation techniques that follow manufacturer specifications and current building codes.
Home Genius Exteriors, an Owens Corning Platinum Preferred Contractor, installs every roofing system with code-compliant underlayment tailored to the region’s specific weather demands. Our crews follow manufacturer installation specifications to the letter, and every project comes backed by extensive warranties that cover both labor and materials. Call today for a free inspection and estimate, and make sure the layer you never see is the one that protects your home for decades.
Frequently Asked Questions
Will switching underlayment types affect my roofing warranty or insurance claim?
It can. Many manufacturer warranties and some insurance claim requirements depend on using approved underlayment products and installation accessories, so ask for the exact product name, approvals, and documentation before work starts.
How do I know if a contractor is using the underlayment brand and grade listed in the quote?
Request photos of the labeled rolls on site and a copy of the purchase receipt or delivery slip that matches the specified product. You can also ask the crew to leave one end label from each roll with your project paperwork.
Does roof pitch or roof complexity change which underlayment is best?
Yes. Low-slope sections and complex designs with many transitions tend to benefit from more extensive waterproofing and detailing because water drains more slowly and has more pathways to work under the roof covering.
Can roof underlayment help reduce attic temperatures or improve comfort in the home?
Underlayment alone isn’t a replacement for insulation and ventilation, but radiant barrier underlayments can reduce heat gain in hot climates by reflecting radiant energy, and high-perm synthetics support moisture vapor management in the roof assembly. For temperature control, focus first on attic insulation levels, air sealing, and ventilation balance.
Is underlayment installed differently under metal roofing than under shingles?
This is often the case. Metal systems may require specific high-heat rated underlayments, slip sheets, or separation layers to reduce adhesion, noise, and thermal movement issues, so you should choose an underlayment to match the metal panel type and attachment method.
Is underlayment environmentally friendly?
Some products offer low-VOC characteristics, recyclable components, or certifications that align with green building goals. If sustainability matters to you, ask for product data sheets and look for third-party certifications, along with local recycling or disposal options.